Drywall Repair
Drywall Repair

Tips For Drywall Repair

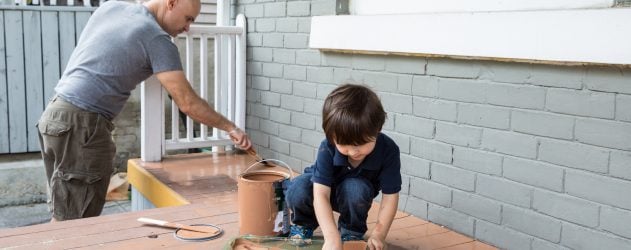
When you have broken drywall, or it has been damaged, you need to make a plan to fix the problem. There are different ways to do this. Whether you use a spackle or joint compound to fix the area, you must know what to do.

Drywall RepairA joint compound is a special mixture used to repair drywall and other gypsum panel joints. It comes in a variety of forms. The best type for your project will depend on the size of your hole. If you have a larger hole, consider spackle. Spackle is a blend of binders and gypsum. The resulting mixture is easy to apply and quicker drying than the joint compound.

You can also use mud instead of joint compound. Drywall mud is easy to sand and is a great solution for small holes. However, you will need to be careful when applying it as it can shrink considerably when dry. Alternatively, you can choose to paint your wall to match the original color. This will ensure that the repaired patch will be invisible.

Spackle and joint compound are two types of fillers that are used to repair drywall. They are both effective in repairing dents and cracks. The key is to choose the right product for the job. Whether you decide to use spackle or joint compound, you’ll need to make sure it’s applied properly. Spackle is a paste-like substance that’s mainly composed of gypsum. It’s a good choice for small repairs, but isn’t suitable for large holes. If you’re trying to repair a large hole, you should consider using drywall mud instead.

Unlike joint compound, which is used to fill large holes, spackle is meant for smaller jobs. This means it’s less messy to apply and dries quickly. There are several brands of spackle available. You can purchase it in small tubes, or in pre-mixed tubs. Using a putty knife, you can spread it onto the area. Once it’s dried, you’ll want to sand it smooth.

In order to fix a drywall hole, you must first cut a piece of drywall to fit the hole. You’ll also need to apply some joint compound to it. The process is relatively easy. Most drywall damage involves small holes or scrapes. These can be repaired easily with basic tools and materials. But, if the hole is too large to be repaired, you’ll have to cut a new section of drywall.

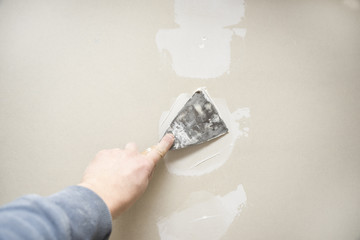
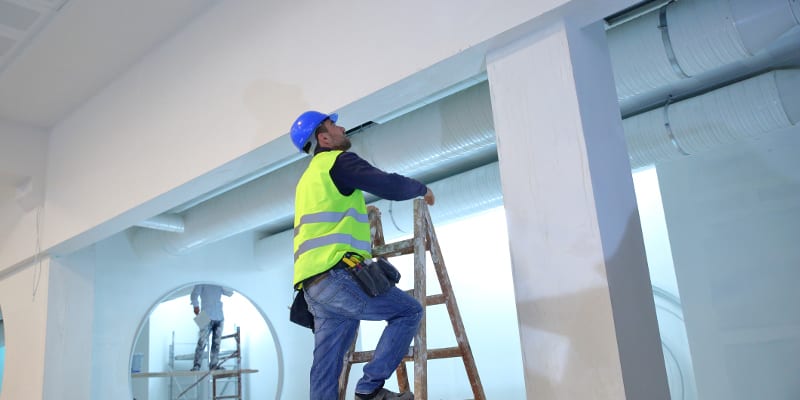
If your drywall is damaged, you can use a drywall saw to cut it out. This will make it easier to remove later. Be sure to use firm strokes. If you want to make the hole smaller, you can apply joint compound or spackle to it. Make sure to leave the edge of the hole clear of drywall. Also, be careful to clean up any leftover dust from the process.

Corner bead repair is necessary if your corner bead has been damaged or dented. This metal piece is used to protect the two sheets of drywall at the corner of an outside wall. If the bead is dented, the drywall is likely to crack. However, there are a few things you can do to fix this issue.

Corner bead repair starts with removing any loose material. You can do this by using a drywall putty knife or a straight-blade screwdriver. It is important to work slowly so you don’t damage the existing bead. Once you have removed the loose material, apply a thin layer of spackling compound on the damaged area. This will provide a smooth surface for you to apply the drywall mud.

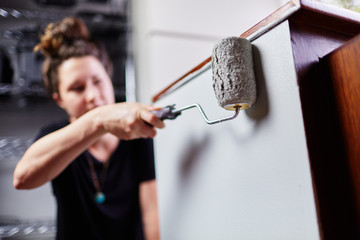
Painting the repaired area after drywall repair is a good way to revitalize the interiors of your home. However, it’s important to make sure you are not painting over any existing blemishes. Leaving them behind can leave your wall looking dirty and unfinished. To get the best results, it’s a good idea to hire a professional. A reputable company will not only take care of the damage, but give you the quality paint job you expect.

If you’re planning on painting your walls, using a quality primer is a good idea. This will help your new paint stick better to the drywall and blend in better with the rest of the room. Getting a mud repair is also a good way to give your wall some texture. Using a roller to apply the mud will help distribute the repair more evenly.

Cabinet Painting
Home Improvement

Cabinet Painting Tips

If you are considering painting your cabinets, there are several different techniques that you can choose from to achieve the look that you want. Before you begin, you will need to determine what type of paint to use. This includes whether to choose water-based paint or oil-based paint. You will also need to consider how you will display your painted cabinets.Cabinet Painting

Preparation for Cabinet Painting Solana Beach is important in order to make the process go as smoothly as possible. You will need to clean and de-grease all surfaces, sand and fill any holes, and apply primer. Depending on the type of paint you use, the preparation process may take two weeks or more.

First, you need to remove all hardware from your cabinets. A cordless drill is a great tool for removing hinges. If your cabinets have adjustable shelves, you should also remove them before painting.

Next, you need to set up your paint station. You can do this on the floor or on a table. Make sure the area you are working in is completely dry and that you have a tack cloth to protect the surface you are painting. This will help ensure that your paint job is dust-free.

Using a high-density foam roller, apply an oil-based bonding primer. This type of primer will seal the surface’s defects and dry quickly. Let the first coat of primer dry for 24 hours, then apply a second coat.

Before applying your final coat of paint, use a paint sprayer. These devices are easy to use and guarantee a smooth finish. They start at around $50 on Amazon.

After painting, you will need to allow your cabinet to cure for at least a week. This should allow the paint to bond with the wood. Paint should be applied thinly to avoid drips. It is also a good idea to have a drop cloth to catch any paint that spills.

Painting your cabinets is an enjoyable project that can make your kitchen look new again. However, you should follow all of the proper steps to ensure that you get the best results. To prepare your work space, you will need to clear off the counters and floors. Additionally, you will need to remove any furniture and other fixtures. Also, you should wear safety gear and have a tack cloth to wipe down any sanding dust that accumulates.

Using a high-quality brush is a good way to ensure that you get a smooth paint job. For oil-based paints, you should use natural-bristle brushes.

If you are considering a new paint job for your kitchen cabinets, you have two options: oil-based or water-based. While both types are effective, there are some major differences.

Oil-based paints are generally more durable. They are also much thicker. This makes it easier to apply. However, they can take up to sixteen hours to dry. In addition, they can be chalky. Moreover, the solvent used to apply them is organic, meaning it has an odor.

On the other hand, water-based paints are quicker and easier to clean up. Also, they are less harmful to the environment. You can even use them near food.

Oil-based paints also have an odor. You should not touch them around children or pets. Moreover, you should apply them in a well-ventilated area. The paint will not be suitable for humid environments.

When compared to water-based paint, oil-based paint has the ability to cover wood surfaces more thoroughly. It can also provide a high-gloss finish. At the same time, however, it will not last as long as water-based paint.

There are some other advantages to using oil-based paints. One is that it produces fewer coats. Another is the fact that it is less expensive. These two reasons make it a preferred option for painting kitchen cabinets.

When choosing between oil-based and water-based paints, you should consider the type of paint solvent. Typically, mineral turpentine is used as the organic solvent in oil-based paint. But there are other petrochemicals as well. For example, acrylic is the most common interior wall paint.

Oil-based paints can be more difficult to clean up than water-based ones. For this reason, it’s best to use a cleaner specifically formulated for these types of paints. You should also use a primer to ensure that the paint will adhere evenly.

Although oil-based paints produce a better finish, they can be messy. Aside from their odor, they can stain, smear, and yellow over time. And they do not provide as many colors as their water-based counterparts.

Painters
House Painting Services

Why You Should Hire Commercial Painters

If you are planning to paint your home, you need to make sure you hire qualified commercial painters. They will be able to get the job done in a timely manner and with the right techniques. You will also be able to find someone who is willing to take on the project at a reasonable price.Painters

Painters  can help you choose the right color for your office. Choosing the right color can affect your productivity and the image your employees portray. Using a color that doesn’t fit with the company culture is a mistake that can affect your business and employee morale.

Besides choosing a color, you must also consider your building’s environment. You want your office to feel welcoming and comfortable to workers and clients. If you are working in a manufacturing facility, for instance, you will need to consider colors that represent the industry.

If you own a law firm, you need to choose colors that convey authority and professionalism. Likewise, a flower shop would benefit from a soothing, green color.

The colors you choose for your exterior walls will influence your clientele. A mix of colors can help you achieve your objectives. However, a color like orange might make people uncomfortable. On the other hand, pink which resembles red is a calming color.

The color of your interior walls will also affect your productivity. While some people need a calming vibe to work, others need the energy to get things done.

Ultimately, you should consider the age of your building’s occupants. The younger crowd will be attracted to bolder colors. Meanwhile, the older generation will prefer neutral hues.

For commercial paint services, you can consult a professional painter. He or she can help you develop a color palette and suggest decorating ideas. Painting experts can provide free quotes and offer color consultations.

Whether you are looking to paint your home or office, hiring the best professional can ensure that you get the look you desire. Your painter can also provide feedback on the top colors that you should consider.

The best way to make sure you stand out from the crowd is to make sure your place of business has an ambiance that sets the right tone. A clean and polished office is the perfect place to start.

One of the best ways to do this is to hire a commercial painter. This small and low-cost investment can result in a swanky new look. Having a new coat of paint is a great way to make your place of business a welcoming place to visit. In addition to painting, make sure to keep the area clean and tidy. Your customers will notice and be impressed by your attention to detail.

Another important step in this process is to train your frontline personnel on the art of the welcome. Having a courteous greeting is one of the best ways to get a warm welcome from your patrons. Make sure to tell them something about your business in the nicest possible way. It might be a small gesture but it’s worth it in the long run. Lastly, remember that a customer is only one click away. Keeping the customer’s attention by giving them an engaging experience will increase their loyalty and keep them coming back for more.

Commercial painting isn’t something to be taken lightly. If you have any doubts, make sure you hire a professional for the job. When you do, you’ll be well on your way to the most enjoyable business venture you’ve ever had. Remember, you only get one shot to make a good impression. Besides, the most memorable customers are often the ones that come back for more. With that in mind, you might want to consider some of the most reputable painting services in your area.

When managing a commercial painting project, it is important to consider the safety of workers. This includes the use of ladders. It is also essential to follow OSHA regulations and the safe handling of hazardous materials.

A well-documented plan helps ensure that the job will be completed on time. Ensure that painters are properly trained to work with dangerous materials. Also, remember to provide appropriate personal protective equipment (PPE) to protect employees from health hazards associated with fumes and paint runs.


Cabinet Painting
Home Improvement

Cabinet Painting – Give Your Kitchen Cabinets a Fresh Look

Cabinet Painting is a great way to give your kitchen a fresh new look. However, there are many things to keep in mind before you get started. You need to determine whether or not you have the proper equipment and tools for the job, as well as the materials you will need. You’ll also need to determine how much work you want to invest in and if you have the time to do it.Cabinet Painting

Painting cabinets involves preparing the surface and applying thin coats of paint. There are three types of paint that you can use: oil-based, water-based, and latex. You need to use the right tools and techniques to achieve the look you’re going for.

The first step in preparing a cabinet is to clean the surface thoroughly. This will remove dust and grease. Cleaning is also important to prevent small particles from getting into the paint. You should then apply a high-build primer.

Next, you’ll need to sand the surface. This will create a smooth base for your paint to stick to. For the best results, sand with fine-grit sandpaper.

Before you can start painting, you need to remove the doors and hardware. You can do this by using a cordless drill or by unscrewing the hinges. This will ensure that the door is smooth and that it will not move during the painting process.

You can also prepare the interior of your cabinet by removing shelves. If you are going to paint the doors, it’s recommended that you wait a day or two before you do so. This will allow the doors to dry properly.

If you are planning on painting the drawers, then you’ll want to use a small brush and roller. You can also buy painter’s tape to mark the location of the shelves and to protect the surfaces from the paint.

In addition to cleaning, sanding, and preparing the surface for painting, you’ll need to sand between coats. You should try to apply thin coats so that the paint will dry more quickly.

If the surface is particularly smooth, you may not need to sand between coats. However, if it’s uneven, you’ll need to sand it down to the surface.

Once the surface is sanded, you’ll need to fill any holes or cracks with a wood filler. You can use a putty knife or a caulk gun to apply the filler. Then, you can smooth the sanded surface with a damp cloth.

You should also test the paint on an unnoticeable area of your cabinet. You should also apply a second coat of paint to prevent the wood from showing through.

Oil-based paints are ideal for painting kitchen cabinets. They provide a smooth, durable finish that will conceal any imperfections on the surface. Besides that, these paints are also very easy to apply. They come in a variety of colors and can be purchased in quarts or five-gallon buckets.

When choosing paint for your cabinets, it’s important to consider durability and VOC levels. You want to avoid painting your kitchen cabinets with oil-based paints if you have children or pets. You also want to consider whether or not the paint is water-based. If it is, you might want to choose a different color to prevent yellowing.

If you have unfinished cabinets, you’ll need to use a primer that will block wood tannins. In addition to that, you’ll need to use a stain-blocking primer. If you decide to use an oil-based paint, be sure to wash your hands thoroughly after each application.

Oil-based paints are usually applied in one coat. It takes about six to eight hours for the first coat to dry. However, you will need to wait at least a day before applying a second coat. This will help ensure the paint adheres better.

When you’re finished with the first coat, you can start applying the top coat. If you are using a spray gun, you can also paint your top coat. You can choose to use a foam roller to achieve a smooth finish. If you have a lot of touch-ups, you might want to apply a clear coat.

Oil-based paints are generally more difficult to apply than water-based or latex paints. They are more durable and will hold up longer. In addition, they are not as prone to peeling or flaking. But, they do require more work, including de-greasing your cabinets.

Aside from that, the odor from oil-based paints can be strong. They can also release very high levels of VOCs. These can lead to serious health effects.

Window Replacement
Window Replacement

Types of Window Repair

You can do many things to ensure that your windows stay in good condition, including cleaning and replacing them. Here are some of the most common types of windows you can have repaired or replaced. You may be in the market for window repair if you have a home with single or double-pane windows. Read on Window Replacement to learn more.

Window Replacement
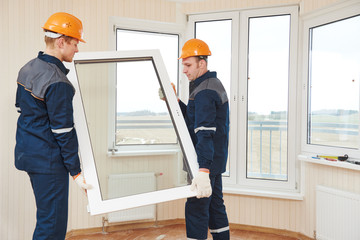
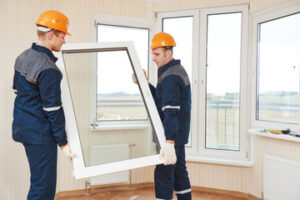
Double-pane windows are a great way to add insulation to your home. This can help your energy bill decrease while reducing your carbon footprint. They can also improve your home’s security and comfort, reducing outside noise.

Most double-pane windows cost between $100 and $300. However, not everyone can afford to replace their single-pane windows. Fortunately, you can get government tax credits, which can cover the price of your new windows. Check out a window replacement cost calculator to get a good idea of how much a new set of windows costs.

These windows can also reduce outside noise, which is a problem for many homeowners. They may be particularly helpful in areas with high noise levels. This could be from traffic, planes, or early morning birds. A quieter house is a happier home.

These windows have a number of features, including a Lo-E coating. This is a thin layer that adds protection against UV rays. These coatings can also help reflect heat, which reduces energy consumption.

In addition, a double pane can help reduce condensation. This happens when the thermal energy in the air can’t pass through the space between the two panes. This can make a double pane more efficient, as it will prevent the buildup of moisture.

Many older homes have single-pane glass windows. This type of window is made of one layer of glass, which is often difficult to clean. It can also affect the efficiency of a home.

Some of the reasons a home owner may need to replace single-pane window glass include leaks, cracks, or broken glass. Replacing a single pane can be a time-consuming process, but it can also make a property owner’s life easier.

The cost of window repair varies from window style to window style. It can be as little as $50 to $200 for the average homeowner to replace a single pane. If more than one pane needs to be replaced, the cost can be as low as $55 per pane.

The replacement cost will depend on the broken glass size and the frame’s quality. A broken double-pane window is more expensive to replace than a single pane.

Older homes often have wooden frames. However, many new homes are built with vinyl or aluminum frames. If your window frame is made of a material other than wood, it’s important to coat it with sealer before installing the new glass.

If you’re unsure about how to replace single-pane window glass, it’s easy to find a window contractor. They’ll have the right tools and materials for the job. They’ll also have experience.

Cleaning or replacing your sliding glass doors. Sliding glass doors are a convenient way to add natural light and style to your home. But they also can be an eyesore if they are dirty. Cleaning or replacing them can improve their overall look and function. Sliding glass door maintenance is easier than it seems. Just follow a few simple steps and you can maintain your windows and doors for years to come.

To clean a window, you need to use a non-abrasive solution. You can apply the solution with a foam sponge or microfiber cloth. Be sure to cover the entire surface of the glass.

In order to get the best results, you’ll need to wear safety gear. For example, make sure you have a helmet or goggles. It would be best if you never used a scraping tool or any abrasive tool to clean your glass. This can cause unnecessary damage to the finish of your glass.

Before you start, make sure your glass cleaner is safe to use. You should also be careful not to spray it directly onto the glass. This can cause premature aging of the insulated glass.

You can also use a high-pressure sprayer to clean your glass. However, be aware of the dangers of using too much pressure. This can cause scratches or blotches.

House Painting Services

Home Improvement Has Many Phases, Follow A Guide To One Below.

If you are not a professional home improvement worker, there is always information that will help you complete your jobs. If you lack some knowledge, the improvement could turn into a catastrophe. This article will provide you with information that will help you defeat what used to be challenging home improvement ventures.


When building your own home through use of a contractor, add a clause to the contract that gives the builder a bonus for finishing on time and on budget. This clause will encourage your builder to do a good job in the time allotted, and can save you a lot of headaches due to missed deadlines and extended budgets.


Hardwood, tile and other smooth surfaces may seem like a good idea in high traffic areas like stairs and hallways, but those same areas can then echo and reverberate throughout the entire house. You wouldn’t want to hear every footstep going down the hallway if you were in a bedroom sleeping.


Improve your home and lower your water bill by changing out your toilet with a more efficient model. Many companies have reduced the amount of gallons it takes to flush and they even feature options, such as flushing only liquids or solids, so you can control how much water is used, depending on what is in the toilet.


Throwing out an old sofa can be very tempting when it no longer looks new and clean. However, with the same effort it takes you to throw it out, you can buy some nice slipcovers and throw it on your sofa. Slipcovers are available in a myriad of designs and can spice up an old sofa very easily.


As was said earlier in the article, home improvement can turn into a great catastrophe if you do not have the knowledge necessary for some of the jobs. Now that you have the knowledge, apply it to your specific needs of home improvement. Don’t let setbacks get you down, trudge through and the practice will make you better.

You can also visit our other websites and post your article.

Emac S Boston, Smart Comms, Our Business On The Beach, Racing-Rewards, Smile A Day, Start Avon, Emerging Entrepreneur, The Kingdom Painting, Success In Kind, Hope Mongers, Get Ready For Cash, DPMN Design, Memories To Memoirs, Umd Energy, Sai Equipment, Annapolis Home Improvement Company, Ehavana Shira, Key To The Keyboard, Mc Millens Frame Shop, North Werks, Oyo Glasses, Prevention Werks, The Loungers, Astronomy Ara, Gary Coe Home Sales, Faux Mage, Fishbone Kitchens D, Comfort Cor Mechanical, Thriving Vancouver, Cil-Hawaii, Jib Portal, Ny Messengers, Bruno MM Carvalho, Expatlens, Lake Land Towing, Plum Creek Home, Shms Online, Staged Homes VA, West Bury Golf, Marietta Land Scape Service

exterior painting
House Painting Services

How to Choose the Right Color for Exterior Painting

When choosing a color for your exterior painting project, take into consideration the architectural details of your house and the character of your neighborhood. If you’re painting wood siding, for example, make sure you let your architect or designer know beforehand. Then, you can get a trial quart of the color you’re considering and change it as necessary. Here are a few tips to help you choose the right color for your home:exterior painting

The composition of exterior paint is important. While acrylic and latex paints use water as a solvent, oil-based paints use turpentine or mineral spirits. Both types of paint contain pigment, which gives them their color. Pigments are plant or animal-based. Additives make the paint look better and can add a satin or high-gloss finish. Fungicides are also added to some exterior paints.

The durability of exterior paint is another key factor. While a standard exterior paint can last between 10 and 15 years on primed wood, stucco has a much longer lifespan. In order to determine how long paint will last, you can look for independent consumer tests in non-biased magazines. These publications simulate years of exposure to outdoor elements. Moreover, they can be used as a guideline when choosing a paint color.

In addition, you must also consider the season for exterior painting. If you live in an area where the temperature drastically changes, you should avoid exterior painting. Since paint doesn’t dry well in a temperature that fluctuates wildly, it’s better to do it on a warm day than in the middle of winter. In addition, be aware that the daytime temperature is less than ideal during the fall and winter months. In addition to the temperature, you need to be aware of sunlight during those seasons since the paint tends to dry slowly.

When choosing paint for the exterior of your home, make sure that you choose to paint with a low VOC. Many paints on the market are low or no VOC. Exterior paint is typically made of oil-based paint that provides a more durable finish. But most exterior paints these days are water-based and contain more acrylic resins. But they can be risky for the environment. Aside from being potentially hazardous, exterior paint is also prone to mildew and mold growth, which can lead to respiratory problems and even respiratory illnesses.

Once you’ve determined the color of your home, you can choose between two types of paint: flat and eggshell. Flat paint is best applied with a paint sprayer; eggshell requires one or two coats. For eggshell paint, you can use a brush to apply overlapping strokes about eight inches apart. Primer is required for changing the color of your home’s exterior, while eggshell paint is best applied by hand using a brush and drop cloth.

Before painting the exterior of your house, you should consider the cost. An average exterior paint job can cost anywhere from $500 to $1000, depending on the complexity of the project and how much prep work needs to be done. For instance, some surfaces require more than one coat, so it’s better to go with a higher quality brand. You can also get the same quality paint supplies for half the cost. If you’re painting a high-traffic area, you may want to choose high-gloss paint.

After choosing a painter, ask for a written estimate. The estimate should include an itemized breakdown of costs. It should include a clear explanation of the entire project, including materials, labor, and finishing touches. The estimate should not have any hidden charges and should be in writing. Most companies provide an estimate through email and a hard copy to their customers. These estimates are based on standard practices and hourly rates. If you’re unsure, ask the company to provide a written warranty on the work.