
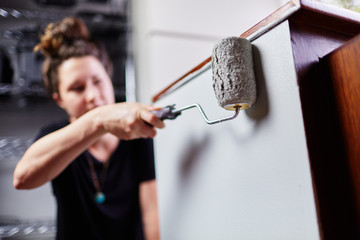
Cabinet Painting is a great way to give your kitchen a fresh new look. However, there are many things to keep in mind before you get started. You need to determine whether or not you have the proper equipment and tools for the job, as well as the materials you will need. You’ll also need to determine how much work you want to invest in and if you have the time to do it.
Painting cabinets involves preparing the surface and applying thin coats of paint. There are three types of paint that you can use: oil-based, water-based, and latex. You need to use the right tools and techniques to achieve the look you’re going for.
The first step in preparing a cabinet is to clean the surface thoroughly. This will remove dust and grease. Cleaning is also important to prevent small particles from getting into the paint. You should then apply a high-build primer.
Next, you’ll need to sand the surface. This will create a smooth base for your paint to stick to. For the best results, sand with fine-grit sandpaper.
Before you can start painting, you need to remove the doors and hardware. You can do this by using a cordless drill or by unscrewing the hinges. This will ensure that the door is smooth and that it will not move during the painting process.
You can also prepare the interior of your cabinet by removing shelves. If you are going to paint the doors, it’s recommended that you wait a day or two before you do so. This will allow the doors to dry properly.
If you are planning on painting the drawers, then you’ll want to use a small brush and roller. You can also buy painter’s tape to mark the location of the shelves and to protect the surfaces from the paint.
In addition to cleaning, sanding, and preparing the surface for painting, you’ll need to sand between coats. You should try to apply thin coats so that the paint will dry more quickly.
If the surface is particularly smooth, you may not need to sand between coats. However, if it’s uneven, you’ll need to sand it down to the surface.
Once the surface is sanded, you’ll need to fill any holes or cracks with a wood filler. You can use a putty knife or a caulk gun to apply the filler. Then, you can smooth the sanded surface with a damp cloth.
You should also test the paint on an unnoticeable area of your cabinet. You should also apply a second coat of paint to prevent the wood from showing through.
Oil-based paints are ideal for painting kitchen cabinets. They provide a smooth, durable finish that will conceal any imperfections on the surface. Besides that, these paints are also very easy to apply. They come in a variety of colors and can be purchased in quarts or five-gallon buckets.
When choosing paint for your cabinets, it’s important to consider durability and VOC levels. You want to avoid painting your kitchen cabinets with oil-based paints if you have children or pets. You also want to consider whether or not the paint is water-based. If it is, you might want to choose a different color to prevent yellowing.
If you have unfinished cabinets, you’ll need to use a primer that will block wood tannins. In addition to that, you’ll need to use a stain-blocking primer. If you decide to use an oil-based paint, be sure to wash your hands thoroughly after each application.
Oil-based paints are usually applied in one coat. It takes about six to eight hours for the first coat to dry. However, you will need to wait at least a day before applying a second coat. This will help ensure the paint adheres better.
When you’re finished with the first coat, you can start applying the top coat. If you are using a spray gun, you can also paint your top coat. You can choose to use a foam roller to achieve a smooth finish. If you have a lot of touch-ups, you might want to apply a clear coat.
Oil-based paints are generally more difficult to apply than water-based or latex paints. They are more durable and will hold up longer. In addition, they are not as prone to peeling or flaking. But, they do require more work, including de-greasing your cabinets.
Aside from that, the odor from oil-based paints can be strong. They can also release very high levels of VOCs. These can lead to serious health effects.
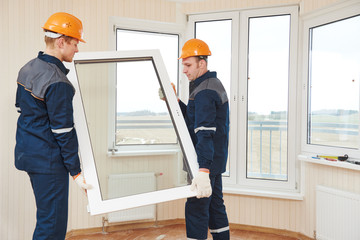
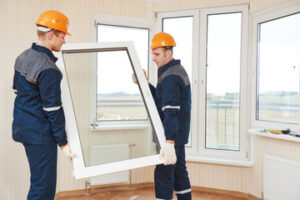 Double-pane windows are a great way to add insulation to your home. This can help your energy bill decrease while reducing your carbon footprint. They can also improve your home’s security and comfort, reducing outside noise.