Stucco
Stucco

Understanding Stucco Installation

If you’re ready to add stucco to your home, there are a few things you should know before you begin. It’s important to understand the installation process, as it varies depending on your house’s underlying structure.Stucco

You should also check local building codes before you start the stucco project. This will help you determine the type of system you need to use. However, if you want to have no hassle with your installation, you can contact the experts at  Stucco Repair Philadelphia.

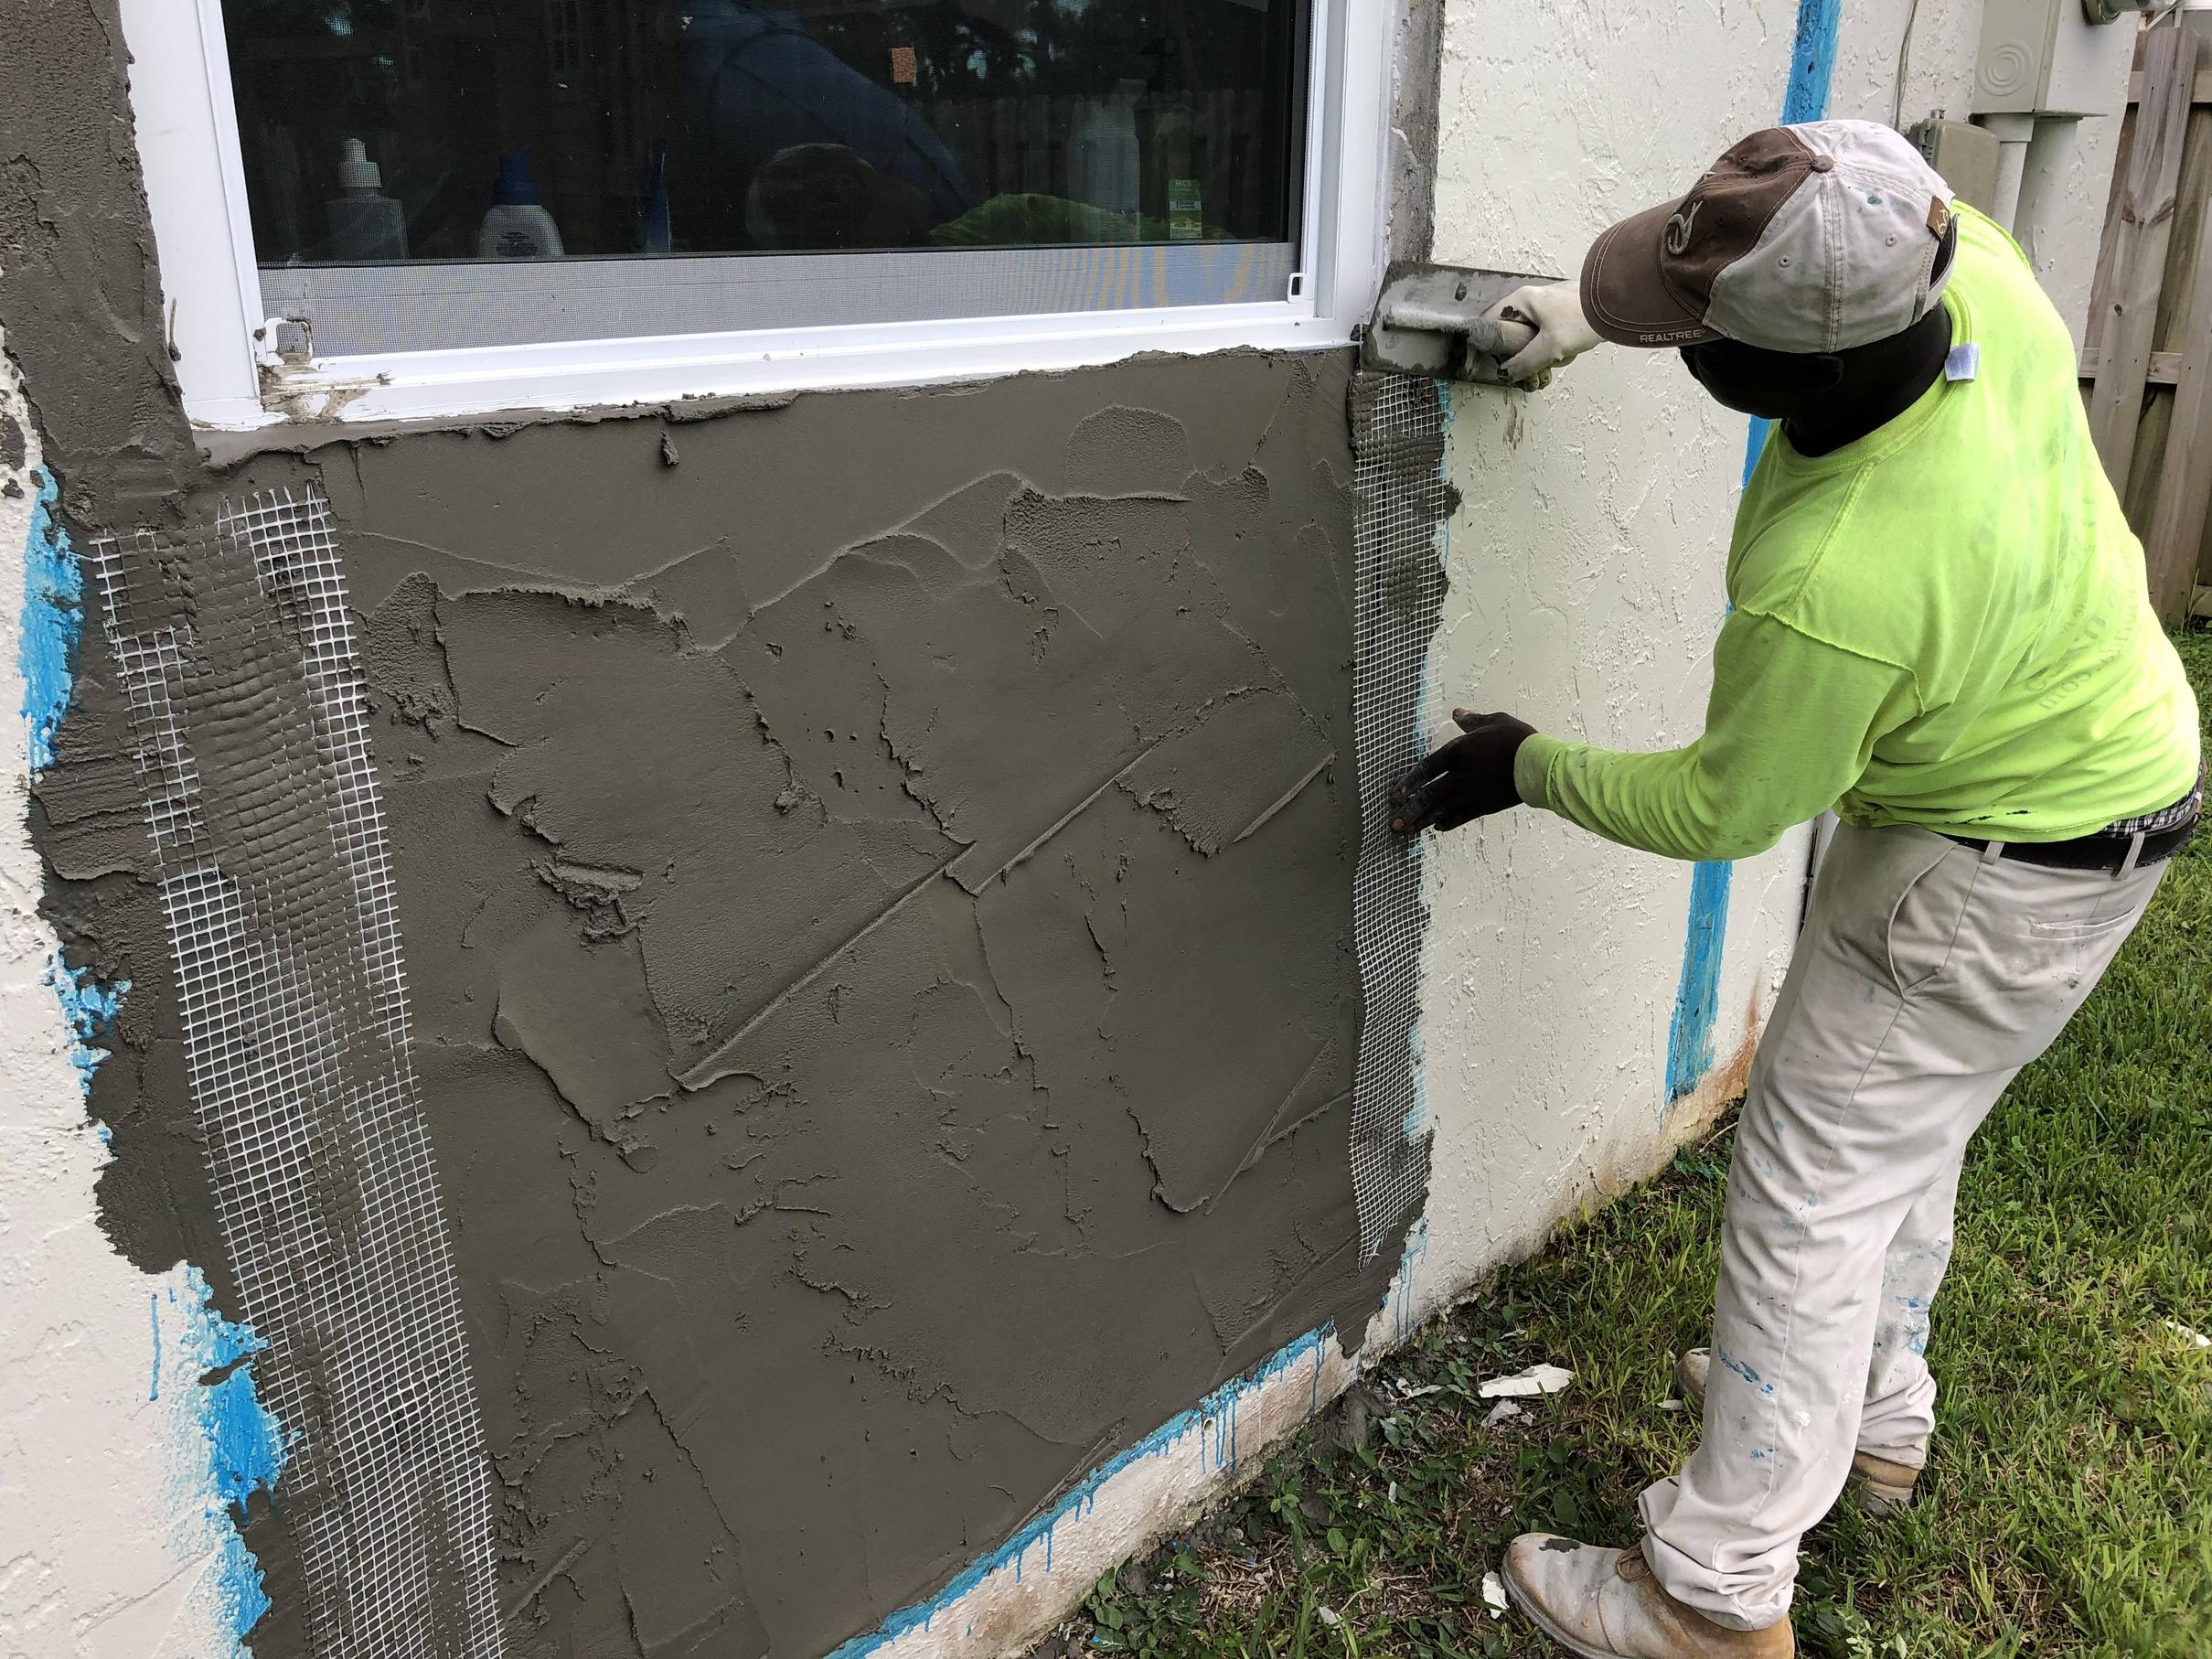
Before you can begin applying stucco to your wall, you must first prepare it. This includes removing old stucco and repairing any cracks or holes in the surface. This will help the new stucco adhere better to the wall and prevent it from cracking, delaminating or buckling.

You should also remove any dirt or debris from the wall before you start the project. Then, you should thoroughly wash the wall with a power washer or a mixture of equal parts vinegar and water to help improve bonding between the stucco and the substrate.

After you clean the wall, you should apply a layer of cement and sand mixture to it in lines. This process, called the scratch coat, helps the next coat (the brown coat) stick to it properly. Then, you should let it cure to ensure that the entire stucco system adheres properly.

This is the most important step in the stucco process, and it will give you the best results. The mix should be made up of 1 part cement material and 2 1/4 to 4 parts sand. Plastic cement, which has been mixed with lime, is usually the easiest to work with. Combine this with plaster sand from a dry material yard.

Alternatively, you can use a combination of coarse and fine sand that has been blended into a paste in the ratio of 3 to 5 kg per cubic meter of coarse sand. The sand should be free from rust and dirt.

Once you have the stucco mix on your wall, you should use a tool called a “darby” to make horizontal lines. This is an easier way to get the stucco to adhere to the wall.

To finish, you should apply a thin decorative finish coat to the wall. This will help add texture and color to your stucco. If you want to paint the exterior, you can do, so after this final layer is applied.

You should also install weep screeds along the bottom of your walls to allow moisture to drain from behind the stucco. In addition, you should secure trim accessories such as casing beads to create clean edges and corners. You can fasten these pieces with galvanized nails or staples.

Stucco is backed by metal lath and building paper (tar paper), which acts as an airspace that helps to prevent water from getting in. This is especially important in wood-frame walls, since stucco often soaks up and holds a lot of moisture that can leak into the sheathing or wall cavity.

The most common underlayment for traditional three-coat stucco is Grade D building paper. It is a kraft-type paper that has water-resistance ratings of 20 to 60 minutes, depending on its thickness. This material is similar to the backing on fiberglass insulation, but it is made of new wood pulp instead of recycled material.

In addition to its insulating properties, Grade D building paper is also used as a drainage plane between the stucco and the metal lath. This helps to prevent water from leaking under the stucco and into the sheathing, which can cause the sheathing to warp.

If you live in an area with a significant amount of rain, the building code requires that two layers of Grade D building paper be used for underlayment. The first layer should be installed about 7/8 inches thick over the metal lath to form a drainage plane that allows water to drain out of the weep screed at the foundation, which is then topped with the second layer of paper.

Exterior Painters
House Painting Services

Exterior Painters Boost Your Home’s Curb Appeal

Exterior Painters Overland  can make a big difference in your home’s curb appeal. Whether you’re looking to sell your home or want to update the look, painting is a quick and affordable way to boost your property’s value.Exterior Painters

Before deciding to hire a pro, take some time to evaluate the condition of your home’s exterior. If water damage or structural issues are present, these repairs need to be addressed before the paint job begins.

The preparation process is a crucial part of any painting job, and exterior painters are no different. They know that poor surface prep can result in a messy paint job that looks bad and doesn’t last long.

First, a home’s exterior should be cleaned thoroughly and completely before painting to ensure that the new coatings adhere properly and will not peel or flake off in the future. Quality painters will use a variety of cleaning techniques to remove all dirt, debris, and loose paint, including pressure washing, low-pressure power washing, and sweeping.

During the washing process, the surfaces are rinsed with warm water and detergent to remove any remaining debris and grime that may have accumulated over time. Using a higher solution-to-water ratio (sodium hypochlorite, bleach, or copper sulfate) is recommended for areas that have mold and mildew growth.

Once the surface is clean and dry, a professional painting contractor can begin the actual painting process. Depending on the size and type of home, it might take a day or more to complete the entire job.

Before starting the paint job, the homeowner should be prepared to take down all furniture and move large objects away from the walls, or place them in a central location that is out of harm’s way. This will ensure that no one touches any electrical wires or other items that could be damaged by paint fumes.

Next, all plants and shrubs close to the house should be trimmed or tied back. This will keep them out of the way while the house is being painted, and it will protect them from any paint chips that might be thrown on their leaves or branches.

The homeowner should also remove any outlet and light switch covers to avoid exposing them to the paint fumes. It’s also a good idea to cover any trees or shrubs with a lightweight canvas tarp to help protect them from the weather and the paint.

The final step in the painting process is laying down primer, which will help paint adhere better to the surface and make the paint look more uniform. It’s best to apply the primer after washing and scraping, so that the surfaces are completely dry before painting.

A primer is a coating that helps to strengthen the bond between your paint and the surface it is applied to. It helps to ensure that the paint job is smooth, even, and lasts for a long time. It is also used to hide blemishes and prevent bleed-through.

There are several different types of primers, each with specific uses and advantages. For example, some are designed for specific applications like masonry, wood, or stucco. Others are made specifically for covering stains or handling odors.

Primer can also help reduce the number of coats needed to cover a color. This is important because it can save you money in the long run.

Another reason you might want to use a primer is if the previous painting is peeling or chipping off. It will make it easier to remove any loose paint and prevent the new coat from falling off, which can happen if you just paint over it without priming first.

You will also need a primer if the existing paint is in bad condition or if you want to protect it from UV rays. It can help to protect your exterior paint from cracking or fading in harsh weather.

deck painting
House Painting Services

Tips for Deck Painting and Staining

Painting your deck can bring a fresh, colorful look to your outdoor living space. It also protects it from damage and fading caused by UV radiation.deck painting

Before you start painting, prep the surface by removing any dirt or mildew. This will help the paint adhere to the wood more effectively.

When it comes to choosing the right stain or paint for your deck, there are a few key factors to consider. These include the look you want, the type of protection you need, and the time and energy you have to devote to your project.

A fresh coat of stain can dramatically improve the appearance of your deck, giving it a fresh look and helping to protect it from the elements. However, it is essential that you choose the right color for your deck. You will also need to take into account the type of wood and its age.

First, determine what kind of wood you have on your deck. Different types of wood require different stains. Tropical hardwoods, for example, are dense and don’t hold a stain well. In these cases, a clear wood preserve is the best option.

Next, choose a stain that matches the color of your home’s interior paint. This will give your deck a consistent appearance throughout.

You can choose from a variety of colors, so you should be able to find something that is suitable for your needs. You should also take into consideration the design of your home and the style of your landscaping.

Lastly, you should test the colors on pieces of scrap wood that are similar to your decking. This will allow you to see how the stain will look before purchasing it.

Before applying any type of stain or paint, it is important to thoroughly clean the surface. This includes removing any mildew, discoloration, and dirt.

It is also important to sand the deck surface before applying any stains. This will remove the rough texture and make it easier to apply the stain or paint.

It is also a good idea to get a professional to clean and prepare the surface of your deck before applying any stains or paint. This will ensure that the deck is ready to receive the treatment and help prevent blotches or streaks from developing later on.

Whether you’re looking to paint your deck for the first time or are considering adding a new coat of color, surface preparation is essential. It ensures that the new coating will adhere well, and it reduces the number of coats required to achieve a smooth finish.

This process can be done with various methods, including sanding, abrasive blasting, and chemical cleaning. It helps remove rust, mill scale, and other dirt from the surface before applying a new coating.

The most effective method for surface preparation is abrasive blasting. This involves the use of small abrasive particles that are thrown at high speed through a flexible hose. This removes rust, mill scale, and other dirt while also creating an adhesion layer for the new coating.

Abrasive blasting can be performed with a variety of materials, such as steel or synthetic abrasives. It is a more expensive and labor-intensive option than using sand, but it can be highly effective in getting rid of old paint and other layers that may interfere with the adhesion of a new coating.

Before you start painting, it’s important to inspect your deck for flaws and potential damage. These can include cracks, splits, or holes in the wood. They can also indicate structural problems, such as a warped deck.

If you find any major issues with your deck, make a plan to repair or replace them before you begin painting. In most cases, this will require a contractor to take care of the job.

Depending on the age of your deck, you may need to sand it down. This will help prepare it for a fresh coat of paint, and it can make the finished project look more professional. You can sand the deck with a power sander or with a sanding sponge.